Hasn't the weather been something!! One day it is 65 beautiful degrees outside with a low of only 40°, and the next day the High is 44° with a Low of 27°. Plus, it hailed Friday night!!! But through it all, I have been growing delphinium, columbine, poppies, and larkspur. It's all thanks to winter sowing.
Now yesterday's post told you all about winter sowing and I hope you took the time to visit the suggested websites, so you know what the North Central Louisiana Master Gardeners are all excited about this winter. Some of our members have been winter sowing for years and some of us, including me, have just hopped on the winter sowing band wagon. Here are some pictures of my winter sowing project.

I started with gallon water jugs and a good potting mix, ProMix.

I used the distilled water to moisten the potting mix.

Throw away the lids. Because you are essentially making a mini greenhouse, you need a hole at the top to let in water and release heat.

I drilled drainage holes in the bottom of the jugs.

Then it was time to cut the jugs so that they would have hinged lids.

This is the goal.

I added soil and planted seeds. Be sure to look up the germination information for your seeds. Some seeds need light to germinate and will just be placed on top of the soil, while others germinate in the dark and must be covered. I don't trust the information on seed packets and it doesn't hurt to double check. Because my soil was moist and rain was forecast for the following day, I did not water in the seeds. Last step was taping the middle of the jugs back together.

Now Mother Nature takes over and provides the moisture, and temperature needed for germination at each seed's optimum time. However, when the seedlings begin to grow and the days begin to get warmer, you can add more holes to the tops of the jugs to release more heat. If a day is unusually warm, as can often happen in our area, you can untape the jugs and open them up. This process of adapting to weather changes is called hardening off and is essential for transplanting success. I read that it was also good to run your hand across the surface of the seedlings to mimic the wind blowing. This stimulates stem strengthening. So I guess we should take time to "pet" our plants. Ha!
Here are the winter sowing projects of two fellow Master Gardeners.

These little winter sowing greenhouses belong to Liz Allison.....
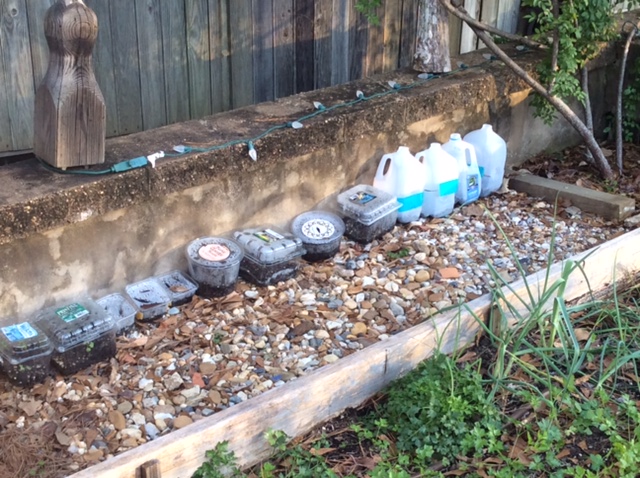
and these belong to Kathy Davis. Notice that they are using lettuce, salad, and strawberry containers for mini-greenhouses. Whatever you use for winter sowing containers, be sure to put drainage holes in the bottom and holes in the top to release heat and let in water.
For more pictures and information, check out winter sowing on Pinterest!
For more pictures and information, check out winter sowing on Pinterest!
I am so excited about winter sowing, most of all because it gives me something to go out and check on in the garden even during this cold time of the year.
Love ya'll,
Shelli
One of the most delightful things about a garden is the anticipation it provides.
~W.E. Johns, The Passing Show
No comments:
Post a Comment